

12 min readBy Joshua Leleux
Table of Contents
- What Happens During an On-Site Survey and Consultation
- Surface Preparation and Cleaning Before Installation
- Window Film Installation Steps and Technique
- Commercial Window Tinting Cost Per Square Foot
- Commercial Window Tint Curing Time and Post-Installation Care
- Professional Installation vs. DIY: Timeline and Quality Comparison
- Workmanship Standards and Quality Control During Installation
- Frequently Asked Questions
Last Updated: October 2, 2026
What Happens During an On-Site Survey and Consultation
The on-site survey determines the scope of your entire commercial window tint installation process and provides a concrete timeline estimate. A technician assesses glass condition, measures space, and understands your goals.
During the survey, the technician evaluates several key factors:
- Glass condition and type. They check for existing damage, tinting, or coatings that affect film adhesion.
- Building orientation. Sun exposure and heat patterns influence which film type you'll need.
- Square footage and window count. Accurate measurements determine labor time and material costs. This is the critical data point for timeline estimation.
- Access requirements. Interior vs. exterior application, building height, equipment needs, and safety considerations.
- Operational constraints. Whether work happens during business hours, after-hours, or weekends affects scheduling and crew coordination.
- Environmental conditions. Temperature, humidity, and weather forecasts impact curing time and installation speed.
The consultation takes 30-45 minutes for spaces under 3,000 sq ft, or 60-90 minutes for larger properties.
Square Footage to Installation Time Estimation
Once measurements are complete, you can expect a realistic timeline. Here's how square footage translates to active installation days:
- 500-1,000 sq ft (small storefront or office suite): 1-2 days
- 1,000-3,000 sq ft (medium commercial space): 2-3 days
- 3,000-5,000 sq ft (large office or retail): 3-5 days
- 5,000-10,000 sq ft (warehouse or multi-floor building): 5-8 days
- 10,000+ sq ft (large industrial or multi-building): 8-14 days or phased approach
These estimates assume standard window types and accessible glass. Curved glass, skylights, high-rise access, or interior obstructions add 1-3 days.
Planning for Business Continuity
During the survey, discuss how installation affects operations: Can work happen after-hours or weekends? Which zones are highest priority? Will light reduction affect specific areas?
Surface Preparation and Cleaning Before Installation
Clean glass is non-negotiable. Dust, debris, or contaminants prevent proper adhesion. Surface preparation is the foundation of quality installation and a major factor in timeline.
The preparation process involves several steps:
- Tack cloth cleaning. Technicians wipe all glass surfaces with a tack cloth to remove fine dust and particles.
- Squeegee scraping. Dried residue, old film edges, mineral deposits, or water stains are carefully scraped away with a plastic or rubber blade.
- Microfiber cloth wiping. A final pass with microfiber removes any remaining debris and lint.
- Inspection under bright light. The glass is examined for spots, streaks, or imperfections that could trap air bubbles during film application.
- Spot cleaning. Stubborn contaminants (bird droppings, tree sap, industrial fallout) may require specialized cleaners or extended scrubbing.
For commercial spaces, HVAC systems, outdoor pollution, vehicle exhaust, and interior dust settle on glass. Thorough cleaning prevents edge sealing issues and ensures proper adhesion for 10+ years.
Time Investment Per Square Foot
The cleaning phase typically consumes 20-35% of total installation time. Here's how to estimate preparation hours for your project:
- Standard office or retail glass (light dust, no prior film): 8-12 minutes per 100 sq ft
- Heavily soiled glass (visible dust, water stains, or pollution buildup): 15-20 minutes per 100 sq ft
- Industrial or exterior-facing windows (heavy contamination, salt spray, or factory dust): 20-30 minutes per 100 sq ft
- Glass with old film residue or adhesive (previous tint removal or weathered coating): 25-40 minutes per 100 sq ft
On a 5,000 sq ft project with standard glass, expect 7-10 hours of preparation across 1-2 days. Heavily soiled windows or prior film residue add 2-4 hours.
Operational Impact During Preparation
Minimize disruption by scheduling prep after-hours or weekends, prepping one zone at a time, communicating with occupants about affected areas, and coordinating with facilities to avoid interference with building systems.
Window Film Installation Steps and Technique
Once glass is clean, the actual film application begins. This is where precision matters. The installation process involves cutting, spraying, positioning, and sealing.
Here's the step-by-step process:
- Film measurement and cutting. The technician measures each window and cuts the film slightly larger than the glass opening. Accuracy is critical, undersized film leaves exposed glass; oversized film causes wrinkles.
- Adhesive spraying. A slip solution (water mixed with a small amount of soap) is sprayed onto the glass. This allows the film to slide and position correctly.
- Film positioning. The film is carefully laid onto the wet glass surface. The technician uses their hands to position it roughly, leaving room for final adjustment.
- Squeegee application. Starting from the center, the technician uses a squeegee to push out air and excess moisture. Pressure is firm but controlled, too much pressure tears the film; too little leaves bubbles.
- Edge sealing. The squeegee works the film edges tightly against the glass frame. Proper edge sealing prevents moisture infiltration and keeps the film secure.
- Trimming. A sharp utility blade carefully trims excess film at the frame edge. This creates clean lines and professional appearance.
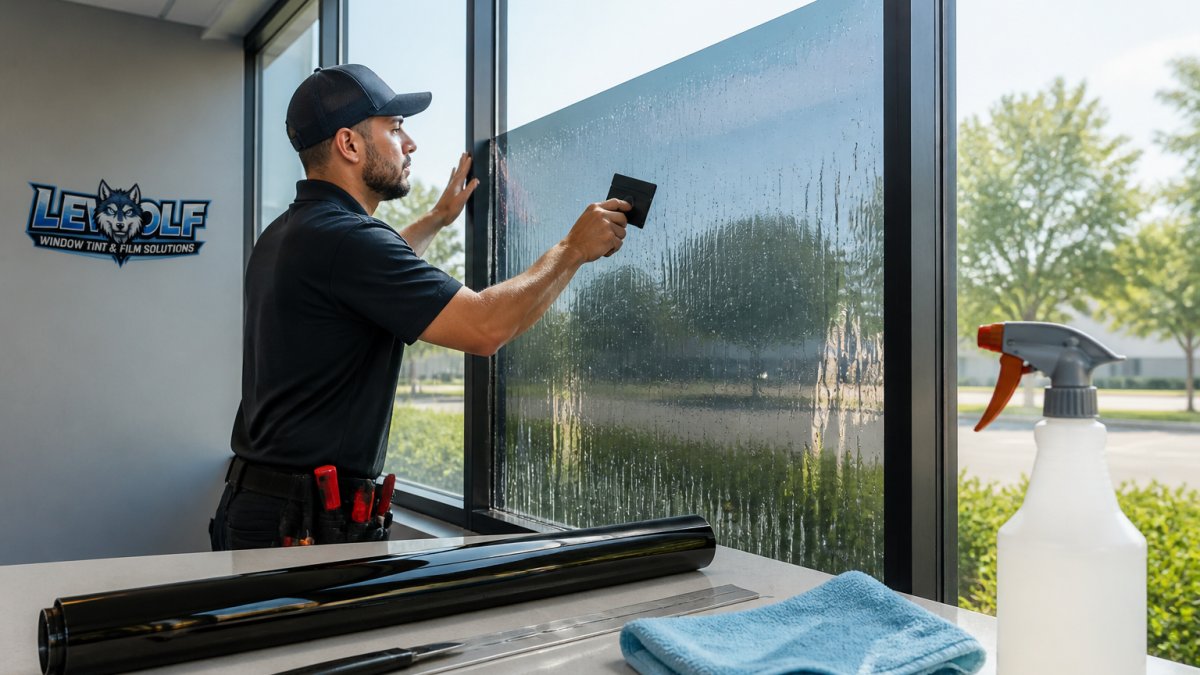
The installation itself, once glass is prepped, typically takes 45 minutes to 2 hours per window, depending on size and complexity.
Commercial Window Tinting Cost Per Square Foot
Pricing for commercial window tint installation varies based on film type, installation complexity, and your location. Rather than guessing, visit LeWolf Window Tint & Film Solutions's pricing page for a current quote tailored to your specific project.
Several factors influence the cost per square foot:
- Film type. Solar control films cost differently than safety films or UV-blocking products.
- Installation difficulty. High-rise buildings, curved glass, or interior obstruction increases labor.
- Square footage. Larger projects typically have lower per-square-foot costs due to efficiency.
- Access and logistics. After-hours installation or complex building access affects pricing.
Most commercial properties benefit from comparing options before committing. LeWolf Window Tint & Film Solutions provides free consultations where a technician assesses your space and provides a detailed estimate. This removes guesswork and helps you budget accurately for your window film installation process.
Commercial Window Tint Curing Time and Post-Installation Care
Curing time is where patience matters. The film and adhesive need time to fully bond with the glass.
Typical curing timeline:
- First 24 hours. Avoid touching or cleaning the film. Water and moisture can weaken the adhesive.
- 3-7 days. The film is mostly cured but still setting. Keep windows closed and avoid cleaning.
- Full cure (14-30 days). Depending on humidity and temperature, complete curing takes 2-4 weeks.
During curing, small bubbles or haze may appear. This is normal and typically clears as the adhesive fully sets.
Post-installation care extends the life of your window film:
- Use only soft cloths and mild soap for cleaning after curing.
- Avoid abrasive cleaners or rough scrubbing.
- Never use squeegees or sharp objects on the film surface.
- Keep windows closed during heavy rain or extreme weather for the first month.
For commercial spaces, communicate curing expectations to building occupants. Explain that the film may look hazy initially and will clear as it cures.
Professional Installation vs. DIY: Timeline and Quality Comparison
Here's the honest comparison: professional installation and DIY are not equivalent.
| Factor | Professional Installation | DIY Approach |
|---|---|---|
| Time per window | 45 min-2 hours | 2-4 hours |
| Equipment needed | Specialized tools | Basic tools (squeegee, spray bottle) |
| Skill required | Years of training | Trial and error |
| Bubble and wrinkle risk | Minimal (under 5%) | High (20-40%) |
| Edge sealing quality | Tight, durable | Often loose or uneven |
| Warranty coverage | Typically included | Usually voided |
| Total project time | 3-7 days (5,000 sq ft) | 2-4 weeks with mistakes |
Professional technicians understand film behavior, adhesive chemistry, and how to manage pressure and temperature.
DIY often starts well but fails at edge sealing or bubble removal.
LeWolf Window Tint & Film Solutions's 30 years of experience means our technicians handle edge cases, curved glass, old buildings with uneven frames, or high-rise challenges, that would defeat a first-time DIY attempt.
Workmanship Standards and Quality Control During Installation
Quality control happens at every step. Professional installations follow strict standards to ensure durability and appearance.
Key quality checkpoints:
- Pre-installation inspection. Glass is examined under bright light for cleanliness and defects.
- Measurement accuracy. Film is cut to precise specifications with no guessing.
- Adhesive consistency. Slip solution is mixed to the correct ratio, too much water causes slow bonding; too little prevents repositioning.
- Squeegee pressure monitoring. Technicians apply consistent, controlled pressure to avoid wrinkles or premature adhesion.
- Edge verification. After installation, edges are checked for tight sealing and proper adhesion.
- Final inspection. The completed installation is reviewed under different lighting conditions to catch any bubbles, wrinkles, or haze.
Professional installations come with warranties. This protects your investment and gives you recourse if something goes wrong.
Workmanship standards also include cleanliness. The installation area is kept tidy, and all debris is removed after work is complete.
The commercial window tint installation process time depends on scope, but understanding each phase helps you plan realistically.
Frequently Asked Questions
How long does commercial window tint installation typically take?
Installation duration depends on the scope of your project. A small storefront with 5-10 windows may take 4-8 hours, while a multi-story commercial building with extensive glazing can take 2-5 days. The timeline accounts for surface preparation, application of window film across all panes, edge sealing, and proper curing time. Our team provides a detailed project timeline during your initial on-site survey based on your specific square footage and building layout.
What is the commercial window tint curing time after installation?
Commercial window film requires 3-7 days of curing time before you can clean or handle the windows normally. During this period, the adhesive sets fully, and the film bonds completely to the glass. We recommend avoiding water contact and abrasive cleaning for at least 72 hours. Full curing may take up to a week depending on temperature, humidity, and the specific film type installed. We provide detailed post-installation care instructions to ensure optimal results.
How is commercial window tinting cost per square foot calculated?
Pricing per square foot varies based on the type of window film selected, building complexity, and installation scope. Factors include film thickness, solar control specifications, safety film ratings, and whether windows have existing tint or coatings. Additional costs may apply for curved glass, skylights, or restricted access areas. We recommend requesting a free on-site consultation to receive an accurate quote tailored to your building's specific requirements and energy efficiency goals.
Will professional window film installation disrupt my business operations?
Professional installation minimizes disruption through careful scheduling. Many commercial clients schedule installation during off-hours, weekends, or in phases to maintain operations. Our team coordinates with your facility management to plan the most convenient timeline. Unlike DIY approaches, professional installation is faster and more efficient, reducing the overall impact on your business. During the survey, we discuss scheduling options that work with your operational needs.